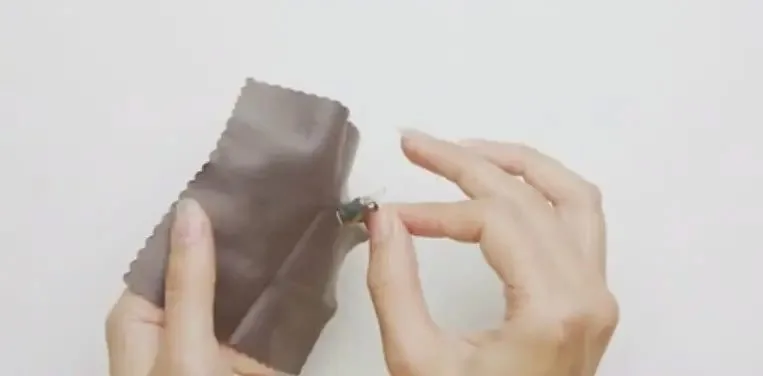
Your hearing aid stopped working this morning. You checked the battery. You turned it off and on. Nothing.
Then you looked closer. A tiny glob of earwax blocked the sound port.
This happens to thousands of hearing aid users daily. Earwax, moisture, and debris accumulate naturally, causing muffled sound, feedback whistling, and complete device failure. The good news? Proper cleaning prevents most problems and extends your hearing aid’s lifespan by years.
This guide shows you exactly how to clean your hearing aid using the right tools, safe products, and proven techniques. Whether you wear Phonak, Starkey, ReSound, or Signia hearing aids, these methods work.
Why Hearing Aid Cleaning Actually Matters
Your ears produce earwax to protect your ear canal. That same protective wax becomes your hearing aid’s biggest enemy.
What happens without regular cleaning:
- Sound ports clog with wax, creating muffled audio
- Moisture corrodes internal electronics
- Microphone openings block, reducing sound pickup
- Receivers fail from accumulated debris
- Feedback whistling increases from poor contact
- Device lifespan shortens by 2-3 years
What proper cleaning delivers:
- Clear, consistent sound quality
- Extended device lifespan (5+ years typical)
- Fewer expensive repairs
- Better hygiene and ear health
- Reliable daily performance
- Protected warranty coverage
The FDA recommends daily cleaning for optimal hearing aid performance. Two minutes of daily maintenance prevents hours of frustration and expensive repairs.
Essential Cleaning Tools You Need
Household items damage hearing aids. Paper towels scratch surfaces. Cotton swabs push debris deeper. Regular tissues leave lint behind.
Professional hearing aid cleaning requires specific tools designed for delicate electronics.
Basic Cleaning Kit
Cleaning brushes:
- Soft bristles remove earwax and debris
- Most hearing aids include one in the box
- Replace every 3-4 months when bristles wear
- Dedicated hearing aid brushes work better than toothbrushes
Wax picks and wire loops:
- Thin metal loops extract stubborn wax from ports
- Wire picks reach into sound outlets safely
- Light pressure prevents damage
- Essential for maintaining sound quality
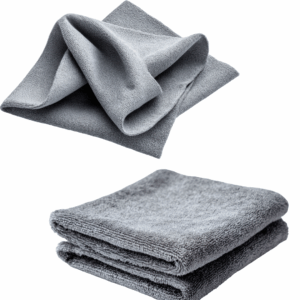
Microfiber cloths:
- Lint-free material won’t scratch surfaces
- Absorbs oils without leaving residue
- Dedicate one cloth exclusively to hearing aids
- Wash weekly to maintain effectiveness
Bulb blowers:
- Gentle air pressure clears microphone ports
- Removes moisture from battery compartments
- Safer than compressed air (which creates too much pressure)
- Prevents pushing debris deeper into openings
Moisture Control Equipment
Electronic dehumidifiers:
- Use gentle heat and airflow to remove moisture
- Smartphone-sized devices protect electronics overnight
- Essential for humid climates or active lifestyles
- UV light models also sanitize while drying
Desiccant containers:
- Budget-friendly moisture absorption
- Replace desiccant packets every 2-3 months
- Packets harden when saturated (time to replace)
- Avoid rice or silica gel not designed for hearing aids
| Tool Type | Cost Range | Replacement Frequency | Essential For |
|---|
| Cleaning brush | Included or $5-10 | Every 3-4 months | All hearing aid types |
| Wax picks/loops | $5-15 for set | Replace if bent | Daily maintenance |
| Microfiber cloths | $5-10 for pack | Wash weekly | Surface cleaning |
| Bulb blower | $5-10 | Rarely needs replacement | Moisture removal |
| Electronic dehumidifier | $40-80 | 3-5 years | Humid environments |
| Desiccant container | $10-25 | Replace packets quarterly | Budget moisture control |
Advanced features like Bluetooth connectivity and rechargeable batteries make moisture control even more critical. These components generate heat during use and contain additional electronics vulnerable to moisture damage.
Safe Cleaning Products (And What To Avoid)
Water and electronics create a dangerous combination. Most hearing aid damage happens from improper cleaning products, not from normal use.
What You Can Safely Use
Warm soapy water (limited use):
- Only for detachable BTE earmolds without electronics
- Mild dish soap mixed with lukewarm water
- Never use on main hearing aid body
- Rinse thoroughly and dry completely overnight
Specialized hearing aid wipes:
- Pre-moistened with safe cleaning solution
- Designed specifically for hearing aid materials
- Won’t damage protective coatings
- Perfect for quick daily cleaning
- Available from hearing aid providers
Distilled water (minimal use):
- Mineral-free won’t leave deposits
- Dampened cloth only, never submersion
- Use sparingly on exterior surfaces only
- Electronics must stay completely dry
What Destroys Hearing Aids
Never use these:
- Alcohol or alcohol-based wipes (cracks plastic, damages coatings)
- Hydrogen peroxide (corrodes electronic components)
- Ammonia-based cleaners (destroys seals and coatings)
- Harsh chemical solvents (irreversible electronic damage)
- Regular household cleaners (too strong for delicate devices)
- Compressed air cans (excessive pressure damages components)
When in doubt, stick to dry cleaning methods. Your hearing care provider can recommend specific products safe for your hearing aid model.
How To Clean Behind-The-Ear (BTE) Hearing Aids
BTE models like the Phonak Audéo Infinio position electronics behind your ear with tubing that delivers sound into your ear canal.
Daily BTE Cleaning (2-3 minutes)
Step 1: Prepare your workspace
- Wash hands thoroughly with soap
- Work over a soft towel (catches dropped parts)
- Ensure good lighting to see debris
- Have all cleaning tools ready
2: Clean the main unit
- Use dry microfiber cloth on entire surface
- Wipe areas contacting skin (oils accumulate here)
- Gently brush microphone ports downward
- Check battery compartment for moisture or corrosion
3: Inspect and clean tubing
- Look for cracks, discoloration, or stiffness
- Wipe exterior with microfiber cloth
- Check for moisture droplets inside
- Replace tubing every 4-6 months
4: Clean the earmold or dome
- Remove from tubing or earhook
- Brush away visible earwax
- Use wax pick for stubborn buildup
- Wipe with slightly damp cloth if needed
Weekly Deep BTE Cleaning (10-15 minutes)
Detachable earmold cleaning:
- Separate earmold completely from hearing aid
- Confirm no electronics attached to earmold
- Wash in warm soapy water (mild dish soap)
- Use soft brush to scrub all surfaces
- Rinse thoroughly under lukewarm water
- Shake out excess water vigorously
- Use bulb blower to clear tubing
- Dry overnight before reattaching
For dome-style tips:
- Replace monthly (don’t attempt washing)
- Wipe daily with dry cloth
- Keep spares available
- Different sizes available for comfort
Tubing moisture removal:
- Detach tubing from hearing aid
- Use bulb blower to force water out
- Hang vertically to air dry overnight
- Never use heat to speed drying
BTE Cleaning Troubleshooting
| Problem | Cause | Solution |
|---|
| Muffled sound | Wax blocking sound port | Use wax pick to clear opening |
| Whistling feedback | Loose earmold fit | Check seal in ear; may need new earmold |
| Crackling audio | Moisture in tubing | Dry thoroughly with bulb blower |
| Weak sound | Clogged microphone port | Brush gently; don’t push debris in |
| No sound | Blocked receiver | Replace dome or clean receiver port |
BTE models typically require tubing replacement every 4-6 months. Stiff or yellowed tubing reduces sound quality and indicates replacement time.
How To Clean Receiver-In-Canal (RIC) Hearing Aids
RIC devices like the ReSound Vivia and Starkey Genesis AI position the speaker directly in your ear canal via a thin wire.
Why RIC Cleaning Differs
The receiver sits in the ear canal where earwax accumulates most. The thin wire connecting receiver to main unit requires gentle handling. Water exposure destroys the receiver instantly.
Daily RIC Cleaning (3-4 minutes)
Step 1: Support the receiver wire
- Hold wire gently while cleaning
- Never pull or bend the wire
- Avoid twisting during cleaning
- Wire damage requires professional repair
2: Clean the receiver dome
- Brush away earwax while supporting wire
- Hold device with receiver pointing down
- Let debris fall away from openings
- Use wax pick for visible blockages
3: Check the wax guard
- Look for brown or orange discoloration
- Blocked guards muffle sound significantly
- Replace monthly or when clogged
- Keep spare guards available
4: Clean the main unit
- Wipe with dry microfiber cloth
- Clean around control buttons
- Brush microphone ports gently
- Check for debris in charging contacts (rechargeable models)
Weekly RIC Maintenance
Replace receiver domes:
- Monthly replacement maintains hygiene
- Weekly for excessive wax producers
- Different styles available (open, closed, power)
- Proper size critical for sound quality
Inspect receiver wire:
- Check entire length for damage
- Look for exposed wires or cracks
- Wire should hang naturally without kinks
- Professional replacement needed if damaged
Clean charging contacts (rechargeable models):
- Use dry cotton swab on metal contacts
- Remove any debris or corrosion
- Dirty contacts prevent proper charging
- Never use wet cleaning on contacts
RIC-Specific Warnings
Never do these:
- Submerge receiver in any liquid
- Use wet cleaning on receiver assembly
- Pull dome off without supporting wire
- Apply excessive force to wire
- Use sharp objects near wire insulation
The thin receiver wire represents the most fragile component. Rough handling causes most RIC hearing aid repairs.
How To Clean In-The-Ear (ITE) Hearing Aids
ITE models sit entirely within your ear bowl, making them more exposed to earwax and moisture than other styles.
Daily ITE Cleaning (2-3 minutes)
Step 1: Surface cleaning
- Use dry microfiber cloth on entire shell
- Clean faceplate thoroughly
- Wipe around all controls and buttons
- Remove oils from areas contacting skin
2: Clean sound ports and microphone
- Hold device with ports facing down
- Brush gently to dislodge debris
- Let gravity pull debris away from openings
- Never push brush into ports
3: Clear wax from openings
- Use wax pick on visible blockages
- Light pressure prevents damage
- Work from outside toward inside
- Stop if you encounter resistance
4: Check vent opening
- Small hole through device allows pressure equalization
- Use thin wire loop to clear blockages
- Blocked vents cause feedback whistling
- Must remain clear for proper function
Weekly ITE Maintenance
Deep surface cleaning:
- Use slightly damp cloth (distilled water only)
- Wipe entire shell carefully
- Dry immediately with soft cloth
- Never allow water near openings
Battery compartment inspection:
- Check for corrosion (white or green buildup)
- Clean contacts with dry cotton swab
- Ensure door closes completely
- Test battery fit and connection
Vent cleaning:
- Thread cleaning wire through vent
- Work from both ends if possible
- Clear any visible blockages
- Vent allows natural sound to enter
ITE Warnings
Critical rules:
- Never submerge in water
- Electronics fill entire shell
- No detachable parts for washing
- Moisture damage happens quickly
- Stick to completely dry cleaning methods
| ITE Component | Cleaning Method | Frequency | Warning |
|---|
| Shell exterior | Dry microfiber cloth | Daily | No wet cleaning |
| Sound ports | Soft brush, downward motion | Daily | Don’t push debris in |
| Microphone openings | Gentle brushing | Daily | Extremely delicate |
| Vent hole | Thin wire loop | Weekly | Must stay clear |
| Battery contacts | Dry cotton swab | Weekly | Check for corrosion |
| Faceplate | Dry cloth | Daily | Clean around controls |
ITE hearing aids require the most diligent daily cleaning due to their position in the ear canal where wax accumulates most heavily.
Daily, Weekly, and Monthly Cleaning Schedule
Consistency matters more than intensity. Brief daily cleaning prevents most problems, while weekly deep cleaning maintains peak performance.
Daily Routine (2-3 minutes every evening)
Before bed routine:
- Wipe entire surface with microfiber cloth
- Brush all ports and openings
- Check for visible wax or debris
- Open battery door or place in charger
- Store in dehumidifier overnight
Why evening cleaning works best:
- Moisture and debris accumulate during daytime wear
- Overnight drying time prevents moisture damage
- Morning devices are clean and ready
- Consistent timing builds lasting habits
Weekly Deep Cleaning (10-15 minutes)
Saturday morning routine:
- Perform daily cleaning steps
- Wash detachable earmolds (BTE only)
- Replace receiver domes (RIC models)
- Clean charging case with damp cloth
- Inspect all components for wear
- Check tubing for discoloration or cracks
- Test all controls and buttons
Monthly Maintenance Tasks
First of each month:
- Replace wax guards (RIC and ITE models)
- Replace dome tips (RIC models)
- Replace tubing if showing wear (BTE models)
- Check battery contacts for corrosion
- Refresh desiccant packets
- Inspect microphone ports under good light
- Document any emerging issues
| Task | Frequency | Time Required | Skip If… |
|---|
| Surface wipe | Daily | 30 seconds | Never skip |
| Port brushing | Daily | 1 minute | Never skip |
| Moisture removal | Daily | Overnight | Never skip |
| Earmold washing | Weekly | 5 minutes | Not BTE model |
| Dome replacement | Monthly | 2 minutes | Not RIC model |
| Wax guard change | Monthly | 2 minutes | No wax guards |
| Tubing replacement | Every 4-6 months | 5 minutes | Not BTE model |
Missing a day won’t cause disaster. But, missing a week creates wax buildup affecting sound quality. And missing a month risks permanent damage requiring professional repair.
Moisture Control: Your Hearing Aid’s Biggest Threat
Humidity, sweat, and environmental moisture cause more hearing aid failures than any other factor. Electronics and water create a destructive combination.
Why Moisture Damages Hearing Aids
What moisture does:
- Corrodes internal electronic components
- Creates short circuits
- Damages microphones and receivers
- Weakens battery contacts
- Reduces battery life
- Causes intermittent failures
Where moisture comes from:
- Ear canal humidity (always present)
- Perspiration during exercise or heat
- Environmental humidity (varies by climate)
- Bathroom steam from showers
- Rain or water exposure
- Improper storage in humid areas
Overnight Drying Methods
Electronic dehumidifiers (recommended):
Gentle heating elements and airflow remove moisture safely without damaging electronics. USB-powered devices run overnight while you sleep.
How to use:
- Place hearing aids in dehumidifier chamber
- Open battery doors fully (or remove from charger case)
- Close lid and activate device
- Run overnight (6-8 hours typical)
- Remove ready-to-wear hearing aids in morning
Desiccant containers (budget option):
Moisture-absorbing packets or beads draw humidity from devices passively. Less effective than electronic versions but better than nothing.
How to use:
- Place hearing aids in container
- Open battery doors or remove from charger
- Seal container with lid
- Leave overnight
- Replace desiccant every 2-3 months
Moisture Control Comparison
| Method | Effectiveness | Cost | Best For |
|---|
| Electronic dehumidifier | Excellent (95%+ moisture removal) | $40-80 | All users, especially humid climates |
| UV sanitizing dehumidifier | Excellent plus sanitization | $60-100 | Concerned about bacteria/germs |
| Desiccant container | Good (70-80% removal) | $10-25 | Budget-conscious, dry climates |
| Nothing | Poor (0%) | $0 | Guaranteed premature failure |
Moisture-Related Activities
Always remove hearing aids before:
- Swimming or water sports
- Showering or bathing
- Hot tubs or saunas
- Hair washing or styling
- Heavy exercise (some waterproof models excepted)
- Steam rooms or facial treatments
Protect hearing aids during:
- Light rain with umbrella or hat
- Humid summer weather with overnight drying
- Winter sports by keeping devices dry
- Gardening or outdoor work in heat
Advanced hearing aids with Bluetooth, rechargeable batteries, and AI processing generate more internal heat during use. These components also contain more moisture-sensitive electronics requiring diligent overnight drying.
Professional Cleaning: When and Why
Home cleaning handles daily maintenance. Professional cleaning addresses internal issues you can’t reach.
What Professional Cleaning Includes
Deep cleaning services:
- Vacuum removal of internal debris
- Specialized tool access to sealed areas
- Ultrasonic cleaning of components
- Replacement of internal wax guards
- Lubrication of moving parts
- Electronic diagnostic testing
Performance optimization:
- Sound output verification
- Microphone sensitivity testing
- Battery contact cleaning and testing
- Firmware updates if available
- Programming adjustments based on performance
- Physical inspection for wear or damage
Recommended Professional Cleaning Schedule
Every six months (minimum):
- Routine maintenance appointment
- Deep internal cleaning
- Performance verification
- Catch small issues before they worsen
Every three months if:
- You produce excessive earwax
- You live in very dusty environments
- You exercise frequently or sweat heavily
- You use hearing aids in harsh conditions
- You’ve had repeated cleaning issues
Schedule immediately if:
- Sound quality deteriorates significantly
- Cleaning at home doesn’t restore performance
- You see physical damage or cracks
- Moisture entered the device
- Controls or buttons stop working
- Battery life suddenly decreases
Injoy Hearing’s professional support includes remote diagnostics and troubleshooting. Licensed hearing care providers can identify issues through the app and determine whether home cleaning or professional service is needed.
Professional Cleaning Cost Considerations
Many hearing aid providers include professional cleaning:
- Part of warranty coverage
- Included in annual service packages
- Bundled with hearing aid purchase
- Free with protection plan membership
Injoy Hearing’s warranty coverage includes professional maintenance support. Lost and damage protection plans cover cleaning-related repairs if home maintenance causes accidental damage.
Common Cleaning Problems and Solutions
Even with proper technique, issues arise. Knowing how to troubleshoot saves frustration and prevents unnecessary service calls.
Wax Buildup Won’t Clear
Symptoms:
- Muffled or weak sound
- Visible wax in ports
- Cleaning brush doesn’t help
Solutions:
- Use wax pick with gentle pressure
- Try slightly damp brush (water only)
- Replace wax guard or receiver dome
- Schedule professional vacuum cleaning
Prevention:
- Clean daily without exception
- Replace wax guards monthly
- Consider ear drop treatments for excess wax
Sound Ports Stay Blocked
Symptoms:
- No sound from one or both devices
- Visual blockage in sound outlet
- Cleaning doesn’t restore sound
Solutions:
- BTE models: Detach and rinse earmold thoroughly
- RIC models: Replace receiver dome and wax guard
- ITE models: Use thin cleaning wire carefully
- All types: Professional vacuum cleaning may be needed
Prevention:
- Daily port cleaning prevents hardened buildup
- Replace disposable components regularly
- Store properly when not wearing
Moisture Damage Symptoms
Warning signs:
- Crackling or static sounds
- Intermittent audio cutting in and out
- Weak or distorted sound
- Controls working inconsistently
- Battery draining faster than normal
Immediate steps:
- Remove batteries immediately (or remove from charger)
- Dry thoroughly with soft cloth
- Place in dehumidifier for 12-24 hours
- Don’t attempt to use until completely dry
- Contact provider if problems persist
Prevention:
- Use dehumidifier every night without exception
- Remove before water activities
- Wipe dry if caught in rain
- Store in dry location
Feedback Whistling After Cleaning
Possible causes:
- Components not fully dry
- Parts not properly seated
- Dome or earmold fit changed
- Earwax blocking ear canal (not device)
Solutions:
- Ensure all parts completely dry
- Reseat all connections firmly
- Try new dome or check earmold fit
- Check your ear canal for wax buildup
- Verify vent openings are clear
Battery Contact Corrosion
Identification:
- White or green buildup on contacts
- Batteries don’t fit properly
- Inconsistent power
- Hearing aid turns off randomly
Solutions:
- Use dry cotton swab to clean contacts gently
- Pencil eraser can remove light corrosion
- Replace batteries with fresh ones
- If corrosion persists, needs professional repair
Prevention:
- Remove batteries if not using for extended periods
- Store devices in dry location
- Check battery expiration dates
- Use quality batteries from reputable sources
| Problem | Quick Fix | When To Get Professional Help |
|---|
| Wax buildup | Wax pick and brush | Blockage won’t clear after multiple attempts |
| Blocked ports | Replace dome/wax guard | No sound after replacement |
| Moisture damage | 24-hour dehumidifier drying | Sounds don’t improve after drying |
| Whistling feedback | Reseat components | Persists after checking all connections |
| Battery corrosion | Dry cotton swab cleaning | Corrosion on circuit board |
| Weak sound | Replace batteries, clean ports | Problems continue with fresh batteries |
Ear Hygiene and Hearing Aid Cleanliness
Your ear health directly impacts how often your hearing aids need cleaning. Better ear hygiene reduces maintenance frequency.
Safe Ear Cleaning Practices
What works:
- Wash outer ear with washcloth during shower
- Let ears dry naturally after bathing
- Use approved ear drops for excessive wax
- See doctor for impacted earwax removal
What doesn’t work:
- Cotton swabs push wax deeper
- Ear candles are dangerous and ineffective
- Aggressive cleaning irritates ear canal
- Digging tools risk eardrum damage
Timing Ear Cleaning
Evening routine works best:
- Clean ears during evening shower
- Let ears dry completely overnight
- Insert hearing aids in morning
- Ears stay drier during wear
Morning cleaning causes problems:
- Residual moisture enters hearing aids
- Water stays trapped in ear canal
- Increased moisture damage risk
- Devices perform poorly with wet ears
Excessive Earwax Management
If you produce more wax:
- Use over-the-counter ear drops weekly
- Clean hearing aids twice daily
- Replace wax guards every 2 weeks
- Schedule professional ear cleanings quarterly
- Consider cerumen management with doctor
Signs you produce excess wax:
- Hearing aids clog within days of cleaning
- Visible wax accumulation daily
- Sound quality degrades rapidly
- Frequent wax guard replacements needed
Skin Oil and Sweat Considerations
For oily skin or heavy sweaters:
- Wipe devices thoroughly after each use
- Clean daily without exception
- Use dehumidifier religiously
- Consider sweat-resistant covers for exercise
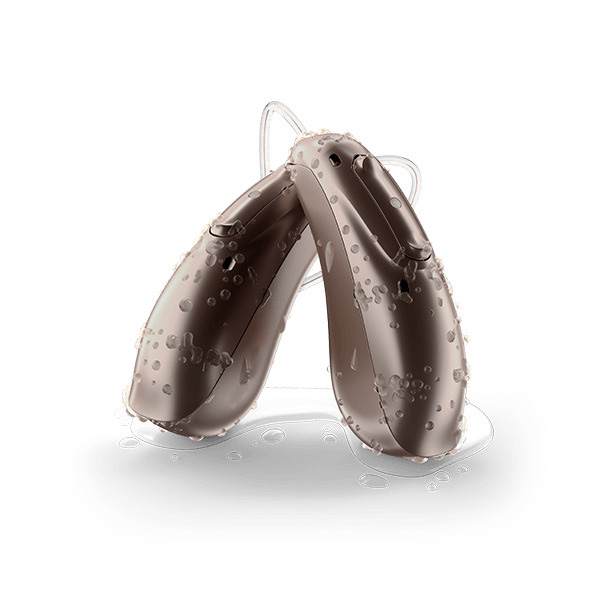
- Choose hearing aids with higher IP ratings
The Phonak Audéo Sphere Infinio and Signia Pure Charge&Go IX both feature IP68 ratings providing excellent protection against moisture and debris.
Cleaning Supplies: What To Keep On Hand
Having supplies ready makes daily cleaning effortless. Missing tools means skipped cleaning sessions.
Daily Use Supplies
Must-have items:
- Microfiber cloths (3-4 dedicated to hearing aids)
- Soft cleaning brush
- Wax pick or wire loop
- Bulb blower
- Dehumidifier or desiccant container
Nice-to-have items:
- Specialized hearing aid wipes
- Multiple wax guards (replacement stock)
- Extra receiver domes (various sizes)
- Spare tubing (BTE models)
- Battery tester (non-rechargeable batteries)
Replacement Schedule for Supplies
| Supply Item | Replace Every | Why |
|---|
| Cleaning brush | 3-4 months | Bristles wear and lose effectiveness |
| Microfiber cloths | 6 months | Washing reduces absorbency over time |
| Wax pick | When bent/damaged | Bent tools can damage devices |
| Bulb blower | Rarely (years) | Durable if kept clean |
| Desiccant packets | 2-3 months | Lose moisture absorption when saturated |
| Wax guards | Monthly | Clog with use |
| Receiver domes | Monthly | Hygiene and effectiveness |
| BTE tubing | 4-6 months | Stiffens and yellows with age |
Where To Get Supplies
From Injoy Hearing:
- Replacement parts for your specific model
- Cleaning kits tailored to device type
- Professional-grade supplies
- Contact for supply orders
Or from other online retailers:
- Generic cleaning tools work for most devices
- Verify compatibility before purchasing
- Brand-specific parts ensure proper fit
- Budget option for basic supplies
Storage and Organization
Keep supplies together:
- Dedicated container or bag
- Bathroom counter or bedroom nightstand
- Travel kit for trips
- Everything in one accessible location
Why organization matters:
- Makes daily cleaning effortless
- No excuses for skipping maintenance
- Quick access when needed
- Supplies don’t get lost or damaged
Travel Cleaning and Maintenance
Hearing aid cleaning doesn’t stop when you leave home. Travel presents unique challenges requiring preparation.
Portable Cleaning Kit
Essential travel items:
- Small microfiber cloth
- Compact cleaning brush
- Wax pick or wire loop
- Small bulb blower
- Portable dehumidifier or desiccant case
- Spare batteries or charging cable
- Backup wax guards and domes
Packing tips:
- Use hard case to protect supplies
- Keep with carry-on luggage (never check)
- Hotel bathrooms often very humid
- Pack extra supplies for longer trips
Hotel Room Drying Solutions
Challenges:
- High bathroom humidity from showers
- No access to home dehumidifier
- Climate changes affect moisture levels
- Different altitudes impact devices
Solutions:
- Use portable USB dehumidifier
- Keep devices away from bathroom
- Store in climate-controlled room areas
- Open battery doors overnight
- Use desiccant packets in travel case
Cleaning in Different Climates
Humid tropical destinations:
- Clean twice daily if sweating heavily
- Use dehumidifier religiously
- Pack extra wax guards and domes
- Wipe devices frequently during day
- Consider waterproof storage between uses
Dry desert climates:
- Static electricity increases
- Dust accumulation accelerates
- Battery doors may stick
- Wipe frequently to remove dust
- Less moisture concern but still use overnight drying
Cold weather travel:
- Condensation forms when entering warm buildings
- Temperature changes create moisture
- Batteries drain faster in cold
- Keep devices warm against body
- Dry thoroughly after coming indoors
Special Considerations for Advanced Features
Modern hearing aids pack more technology into smaller spaces. Advanced features require additional cleaning attention.
Bluetooth Hearing Aids
Extra cleaning considerations:
- More internal heat generation
- Additional electronic components
- Longer daily use increases exposure
- Streaming increases moisture risk
Bluetooth models include:
Cleaning emphasis:
- Never skip overnight drying
- Clean charging contacts weekly
- Inspect for heat-related wear
- Professional cleaning every 6 months minimum
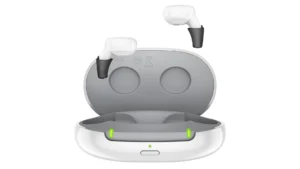
Rechargeable Hearing Aids
Charging contact maintenance:
- Clean metal contacts weekly with dry swab
- Remove any debris preventing connection
- Check for corrosion (green discoloration)
- Dirty contacts prevent proper charging
Charging case cleaning:
- Wipe interior with dry cloth weekly
- Remove lint or debris from charging pins
- Check case for moisture accumulation
- Clean USB port if dust collects
Battery longevity through cleaning:
- Proper maintenance extends battery life
- Moisture damage reduces charging capacity
- Clean contacts ensure full charges
- Professional inspection verifies battery health
Rechargeable hearing aids require consistent cleaning to maintain charging efficiency and battery lifespan.
AI-Powered Hearing Aids
Advanced features create cleaning needs:
- More microphones mean more ports to clean
- Additional sensors require clear operation
- Complex processing needs clean sound input
- AI performance degrades with dirty microphones
Models with AI features:
Maintenance priorities:
- All microphone ports must stay clear
- Environmental sensors need clean openings
- Performance depends on quality sound input
- Professional calibration verifies optimal function
When To Seek Professional Help
Home cleaning handles routine maintenance. Some situations require professional expertise.
Cleaning Can’t Fix These Issues
Seek professional help for:
- Physical cracks or broken housing
- Exposed internal wiring
- Persistent moisture despite drying
- Controls or buttons not working
- Severe corrosion on battery contacts
- Sound quality doesn’t improve with cleaning
- Devices stop working entirely
Remote Support Options
Injoy Hearing provides remote assistance including:
- Video consultation for cleaning guidance
- Diagnostic testing through smartphone app
- Remote programming adjustments
- Troubleshooting without office visits
- Decision support for repair vs. replacement
When remote support works:
- Cleaning technique questions
- Minor performance issues
- Battery or charging problems
- Programming adjustments needed
- General maintenance guidance
When in-person service is needed:
- Physical damage visible
- Internal cleaning required
- Component replacement necessary
- Warranty repair work
- Device not responding at all
Protection Plans and Warranty Coverage
Injoy Hearing’s warranty includes:
- Manufacturer defects covered
- Professional cleaning support
- Remote programming included
- Troubleshooting assistance
Loss and damage protection covers:
- Accidental damage from improper cleaning
- Moisture damage despite proper care
- Lost devices (replacement coverage)
- Physical damage from drops or impacts
Understanding coverage before problems arise saves money and frustration. Most cleaning-related issues fall under normal warranty coverage if you’ve followed proper maintenance protocols.
Your Hearing Aid Cleaning Questions Answered
How often should I clean my hearing aid?
Clean your hearing aid daily. Wipe surfaces and brush ports every evening before bed. Deep clean weekly including washing detachable earmolds (BTE) or replacing domes (RIC). Replace wax guards monthly. Professional cleaning every six months maintains optimal performance. Daily cleaning takes 2-3 minutes but prevents expensive repairs and extends device lifespan by years.